File:
https://raw.githubusercontent.com/mfput/CTF-Questions/master/file12.zip
Question: When was the flag deleted? Format: "YYYY-MM-DD HH:MM:SS"
Hint: Utilizzare uno strumento chiamato rifiuti.
Answer: 2018-11-04 02:43:31
Question: When was the flag deleted? Format: "YYYY-MM-DD HH:MM:SS"
Hint: Utilizzare uno strumento chiamato rifiuti.
Answer: 2018-11-04 02:43:31
Here
we have a zipped folder. Upon unzipping the folder it looks empty. Of
course it is not, as the size of the zipped folder is over a kilobyte
big. If you have Windows Explorer set to view hidden files, you can
actually see the files inside of it while zipped.

Now
we don’t have a forensic image, so there won’t be any NTFS
artifacts to help you here. There are files inside this folder, and
as we learned earlier, some files have attributes that make them
hidden to Explorer. We can use the command “dir
/a” to view all
files in the directory. Inside the folder there is a directory with
the name of a user SID (Security Identifier). We can use the “attrib
filename”
command to view the attributes of that file.

Here
we can see that the S-1-5 directory has the “S” and “H”
attributes. These attributes denote “System” and “Hidden”.
We can remove these attributes with a minus sign to make this
directory appear normally in Windows Explorer. “attrib
-s -h filename”.

Now
the directory becomes visible to use once a gain. If we wanted to add
those attributes back, we would use “attrib
+s +h filename”
and the folder would become hidden again. To see a full list of
attributes, use “attrib
/?”. Now the
S-1-5 directory is empty. Or is it really? Upon further inspection
there are two files hidden in the directory: “desktop.ini” and
“INFO2”. The desktop.ini file is not relevant to finding the
flag. Using the attrib command we can see that INFO2 has the “A”,
“S”, and “H” attributes (A is for archived). Similar to
before, we will make this file visible to Explorer with the attrib
command “attrib
-s -h INFO2”.

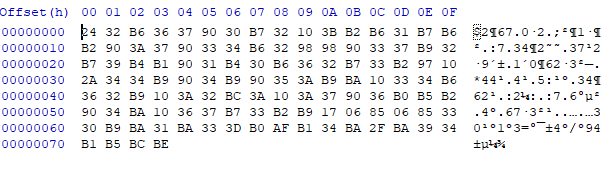
When
opening the INFO2 file in a text editor, we can see the flag, but the
data isn’t being parsed right. We can’t tell when it was actually
deleted with this method.

This
is where our hint comes in handy. “Utilizzare uno strumento
chiamato rifiuti” is Italian and roughly translates to “Use the
tool called trash”. Trash is not a tool that can help you, but
rifiuti can. Rifiuti is a Windows forensic tool used for Recycle Bin
forensics. An INFO2 file is actually a log of the pointers of files
that are sent to the Recycle Bin. You can download Rifiuti2 (improved
version of the original tool) here:
https://abelcheung.github.io/rifiuti2/.
Use the normal rifiuti.exe and not rifiuti-vista.exe against the
INFO2 file. “rifiuti.exe
INFO2”.

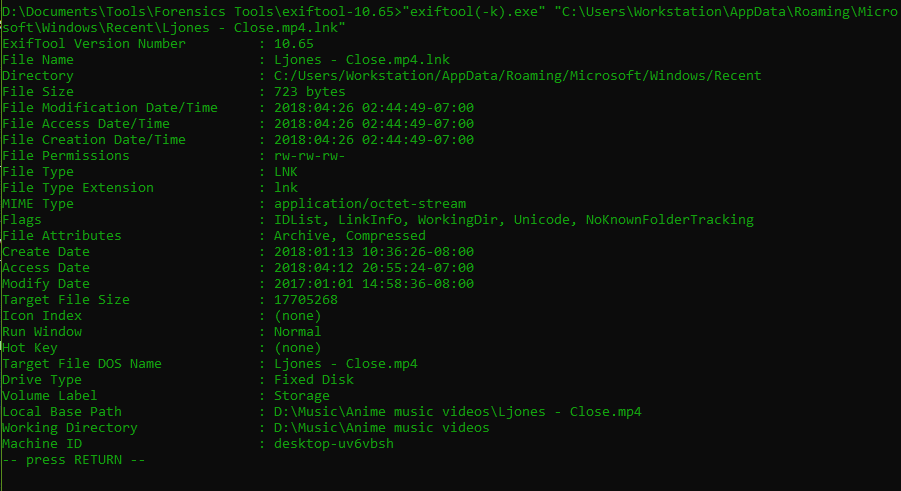
With
the data now parsed correctly, the flag.rtf file was deleted with a
timestamp of “2018-11-04 02:43:31”. Rifiuti2 tells us the name of
the deleted files, if they were emptied or not, the size on disk and
the path.
INFO2
files are located at “C:\Recycled\INFO2”
for Windows 95/98/ME and “C:\Recycler\SID*\INFO2”
for Windows NT/2000/XP. Initially there was one INFO2 file the
machine. With NT, 2000, and XP, there exists an INFO2 file for each
user, located in the SID folder belonging to that user. This way, it
is possible to tell which user sent the file to the recycle bin.
Starting
with Windows Vista, INFO2 files were replaced by $I files located at
“C:\$Recycle.Bin\SID*\$I*”.
You can use the “rifiuti-vista.exe” to parse $I files. Supposedly
EnCase and FTK should also support parsing INFO2 files.
Like my work? Donate here: https://buymeacoffee.com/forensicnoobsecurity
That
concludes the 12 questions for the FAST CTF! I am sure you learned
something new and the skills you learned will help your endeavors
into the future.


